All posts by Daniel

Results

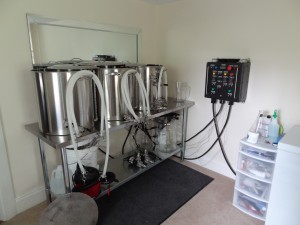
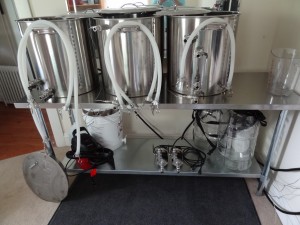
First brew day is a wrap.  There were a few bumps in the road but I now have ten gallons of soon to be beer in my fermenter.  The biggest lesson is pumps do not like whole hops.  This caused issues with chilling, transferring, and cleaning.  I am using a whirlpool with immersion chiller.  I figured I did not need a screen on the kettle pickup.  From now on I will try to stick to pellets only and use a hop bag if I need to use whole leaf hops.  The rest of the system worked great.

Efficiency came in at 90%.  It should be higher if I manage the sparge  water better.  I also think I will heat my strike water higher to hit my mash temperature faster.  I may try half way between my mash temperature and the temperature I would use when batch sparging in a cooler.  I also will fill the mash tun with enough water to cover the dead space under my false bottom and fill the pumps and coil.

Water profile.  I got relatively close using straight tap water and salts.

Target – Ca=110, Mg=18, Na=16, Cl=50, S04=275, HCO=70
Actual – Ca=109.8, Mg=19.4, Na=11, Cl=49.5, S04=215, HCO=101.3

Mash pH looked fine but I was using test strips and not a meter.  I did not acidify my sparge water.  I will be getting a meter and some latic acid to address this on the next brew day.

Inaugural brew day

I am brewing up a batch of Kal’s Electric Pale Ale.  It seems like a fitting first brew.

Using 95% efficiency – OG 1.057 / FG 1.010 / IBU 39.5 / SRM 4.9 / ABV 6%

15.5# (78.5%) 2-row Malt
3.5# (17.7%) Germain Vienna Malt
.75# (3.8%) Crystal 40°
20 minute hops  – 1oz Centennial / 1oz Amarillo
10 minute  hops – 2oz Centennial / 2oz Amarillo
0 minute hops – 2oz Centennial / 2oz Amarillo
Dry hops – 2oz Citra 7 days
2 Packs of US-05 dry yeast rehydrated

Batch size – 12 Gallons
Water profile – Ca=110, Mg=18, Na=16, Cl=50, S04=275, HCO=70
Mash – 1.25qt/lb – 90 minutes @ 152°
Boil time – 60 minutes

His more detailed recipe is located at the following link.  Ordering the ingredients  via his links will help support his site.

Prepping for first brew day

Did some volume checks to find my dead spaces.   I also finished marking the sight glasses.  The boil kettle and HLT measure the full volume of the kettle.  The mash tun sight glass measures gallons above the false bottom.  I do not care about he volume below the false bottom since it has no effect on my mash thickness.  I may make a new dip tube for the mash tun to leave less sweet wort behind but I will first see if has a major impact on efficiency.  I am not concerned about having super high efficiency just very repeatable efficiency.

Boil Kettle and HLT  = 2.3qt/.575 Gallons
Mash tun under pickup = 3.5qt/.875 Gallons Made a new dip tube
Mash tun under pickup = 2.0qt/.500 Gallons
Mash tun under false bottom = 8.5qt/2.125 Gallons

DSC02357DSC02356DSC02358

Setup for SYL-1512A

I used Auber SYL-1512A PIDs for the mash temperature displays.  These are not used in Kal’s original design.  The following is how I set them up.

Enter system configuration menu
1. push set
2. enter 0089
3. push set
In the system configuration menu change the follow entries
1. intY to PT100 (for probe type)
2. outY to 0 (output set to alarm only)
3. PSb to correct your temperature probe reading if necessary
Exit the system configuration menu

Optional – I have not set this filter value but I may if the temperature display is jumpy.

Enter tuning/performance menu
1. push set
2. enter 0036
3. push set
In the tuning/performance menu change the follow entries
1. filt to 1 (for weak filtering, default is 0 for no filtering)
Exit the tuning/performance menu

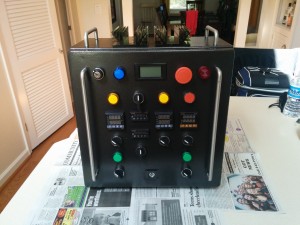
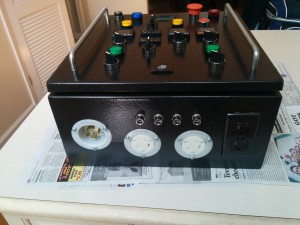
Panel is complete

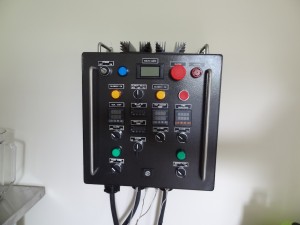
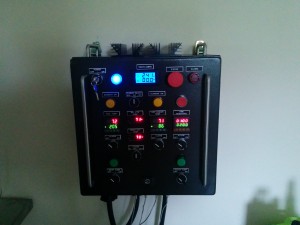
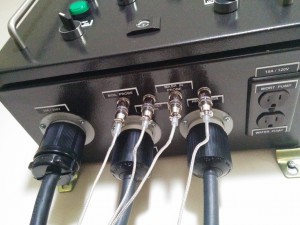
The control panel is complete!  Amazingly all parts and pieces are functional, nothing was DOA.  I am waiting on a tag for the mute button, if you notice that missing.  I wired up and tested the elements and verified they work.  They pull about 21 amps according to the meter.

pan_frontpan_bottom

Pump mounts

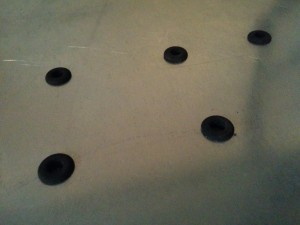
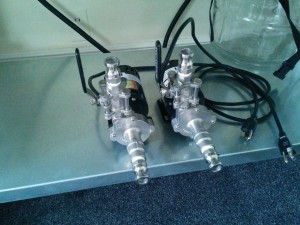
I decided to mount the pumps directly to the brewing stand.  I used rubber grommets to help isolate the pumps from the metal shelf.  They seem to have worked nicely.  There is no odd noises or vibration in the stand or pumps while they are running.

pmount_closemounted

Auber JSL-73B wiring

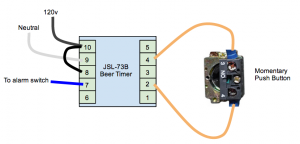
This seems to be a common question on the forums.  People looking to use Auber’s beer timer vs the more expensive Omega timer used by Kal.  Since the Auber timer is designed to do many events I wanted the push button on my panel to just dismiss/mute the alarm after each event.  You can wire it to function as a reset by moving the wire in pin 4 to pin 3.

jsl73b

A discussion on differences

I based this project very closely on Kal’s design at www.theelectricbrewery.com.  If you do the same please try to use the links on his website to help support him.  I decided to make some changes to the design.  I will follow up after I start using the system if I think they add any value.

1. I added an extra temperature probe on the input of the mash tun.  This will let me monitor both the temperature going in and coming out of the mash tun.  Kal does not monitor this since he has found that his system and process makes the HLT temperature the same as the mash in temperature, there for  it would be redundant.  Hopefully this will be the same case for my system, but who does not want extra bling and it will help me know if anything is going wrong.  Instead of using two SYL-2352 1/16 DIN PIDs I used cheaper and smaller SYL-1512A 1/32 DIN PIDs.  These are for temperature display and alarm purposes only so I do not need the features of the larger PID.  I also swapped the two position alarm switch with a three position so I can set an alarm for either PID.

2. I used the Auber JSL-73B timer for for beer brewing vs the Omega timer.  I think the ergonomics are better on the omega but I like the timer options on the auber better, plus it is cheaper.  I hooked the red momentary button on the panel to the mute not the reset.  The wiring is as follows. Pins: 10-8=120v power, 9=neutral, 7=alarm switch, 4-2=mute.  The mute is simply a loop between 4 and 2 with the momentary switch in between.  There is no need to supply power or neutral like the omega.  I will add a post with a drawing.

3. Box orientation.  My panel opens upward.  This was originally done because was going to set the panel on a table are run the electric into the side of the panel.  That plan changed but it does look more symmetrical and the cable plate is not an issue now.

4. Combined amp/volt meter.  Picked up a cheap combo meter off ebay.  It runs on 240v so there is no need for the doorbell transformers.  This frees space inside and on the front of the panel and removes parts.

5. Added an emergency stop.  It is simply wired before the power lead to the power switch.

6. Used a combined buzzer/light for the alarm.

7. I did install a safe start relay.  I mistakenly purchased at relay with a 240v coil.  The only change I needed to make was to swap the neutral lead with a lead to the other 120v leg.  As a side effect the safe start relay now checks everything in the panel.  Requires good 120v from leg A and leg B to power the coil on the relay.  It checks the state of the pump and element switches and finally it requires a good neutral to activate the main power contactor.

8. The guys at chugger do not like you cutting the standard plug off their pumps so I used a standard two plug outlet for the pumps.

9. I used Chugger pumps vs March pumps.  Chuggers were cheaper and it seems like they have worked out their earlier kinks.

10. I used less expensive kettles.  They are 20 gallon stainless Concord stock pots (18″ wide x 19″ tall).  At $99 each they are much cheaper then the Blichmann boil makers.  The Blichmann’s are far nicer but I could not justify the cost.  I used a false bottom from jaybird that is built like a tank.

11. Cam-locks vs quick-disconnects.  I doubt these mater much.  I like the cam-locks because they are more open so there is less chance of things getting gunk’ed up in places that are hard to get to.

12.  I am using a whirlpool with immersion chiller vs a plate/counter flow chiller.  I am also not using a hop stopper but plan to build a “hop dam” in the kettle that when combined with the whirlpool will keep trub away from the kettle pickup.  I am also planing on upgrading my chiller to a The King Cobra by JaDeD brewing.  This should match or even exceed the performance of most plate/counter flow options.

It has guts

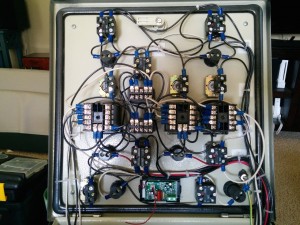
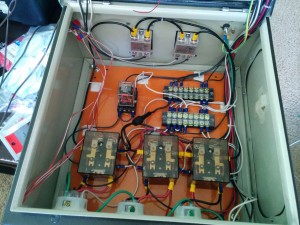
More progress.  All the 10 and 14 gauge wire has been run.  I need to finish the 22 gauge for the temperature probes and volt/amp meter.  The electrician will hopefully be installing my spa panel soon so I will be able to start testing the panel.

IMG_20140522_102731IMG_20140522_102737

Panel Progress

The external components of the panel have been installed.  The last thing I need on the outside is the panel tags/labels.  I am now working on the internals and wiring.

IMG_20140520_094615IMG_20140520_094556