Random IPA

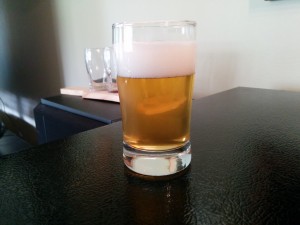
I had some random hops laying around for a while so I brewed up an IPA to use some.

70% (11#) – Pale malt
20% (3#) – Rye
7% (1#) – Crystal 60
3% (.5#) – Carapils/Dextrine malt
WPL-001 California ale yeast
75 IBU (1.5oz) – Warrior @ 60min
15 IBU (1.0oz) – Amarillo @ 15min
3 IBU (.5oz) – Amarillo @ 5min
4 IBU (.5oz) – Simcoe @ 5min
0 IBU (.5oz) – Amarillo @ 0min
0 IBU (.5oz) – Simcoe @ 0min
0 IBU (1.0oz) – Citra @ dry hop 5 days

OG: 1.067
FG: 1.013
IBU: 98
SRM: 10
ABV: 7.1%

5/12/14 – Brew day, yeast pitch, fermenter @ 60°

The 3 week lager

I think this beer came out great.  Munich Helles is a great show case for pils malt and I am interested in trying some more beers with it.  Three weeks is very fast but I do not taste any bad off flavors.  The only issue was under attenuation.  I was expecting 1.012 for my final gravity and I ended up with 1.017.   Sweeter then intended but not bad.  I think I might add another week to this lagering schedule.  I will track the gravity closely on the next batch.  I need to get a beerbug.

Next fast lager attempt @ 4 weeks:
7 days – 50° (half attenuated?)
5 days – Bumping temp by 3° every day (50° to 65°)
5 days – 65° (nearly fully attenuated?)
3.5 days – dropping temp 5° every 12 hours to 30°
7.5 days – 30°
Total = 28 days

IMG_20140507_085454

Hopefully the last few major orders

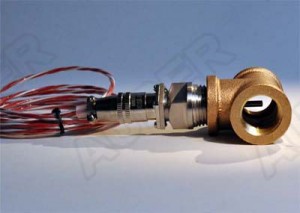
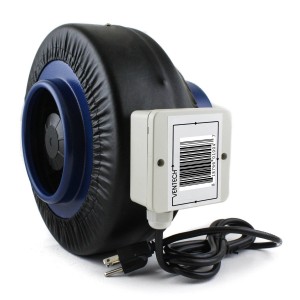
The RTD temperature probes have been ordered.  I also ordered a few extra normally closed contractor blocks for the panel switches.  These will allow me to setup a safe start interlock for the panel.  I spent the extra money for 25′ of 3/16″ walled 1/2″ ID silicon tubing to avoid any kinking issues.  Finally I am making a home made vent for the boil kettle based on this post.  It will be built from a 30qt stainless steel mixing bowl, a 4″ duct fan, and dryer hose.

rtdprobefan

auberins.com
3x RTD sensor, 1.5″ probe, 1/2″ NPT thread
1x RTD sensor, 2” probe, weldless fitting
4x NC switch block

amazon.com
1x White silicone tubing, 1/2″ ID, 7/8″ OD, 3/16″  wall, 25′ length
1x VenTech IF4 4″ inline duct fan 190 CFM
1x Stainless steel mixing bowl, 30 quart
1x 4″x8′ flexible duct


More dremeling

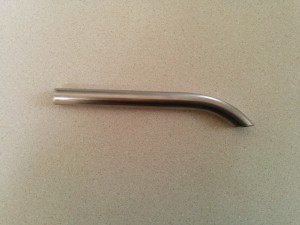
Volt/AMP meter hole has been cut.  The 5/8″ dip tube has also been cut.  It was designed to fit entirely under the false bottom including the bulkhead.  I left a half of an inch between the bottom of the dip tube and the bottom of the mash tun.

IMG_20140505_144109 IMG_20140505_142834 IMG_20140505_143027

An industrious weekend

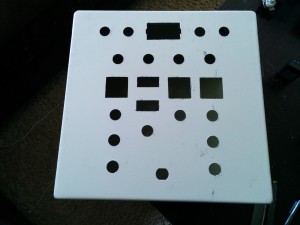
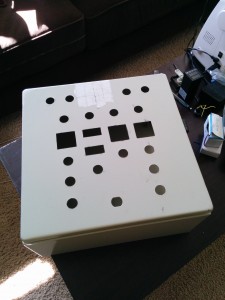
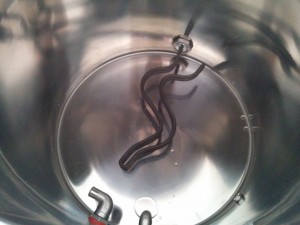
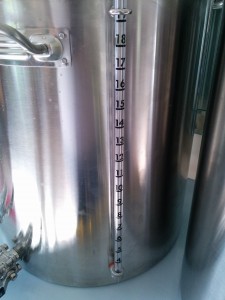
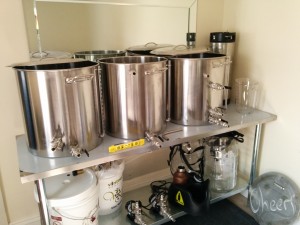
Real progress has been made now that the punches have arrived. Doing all of this with a step big is possible but I would not recommend it.  I started each hole with a 1/8 bit then used a step bit to widen it to accept the lug for the punch.  The dremel also got a bunch of work.  I cut the factory grounding post off the panel to make more space for the buzzer and the holes for the PIDs and timer.  I still need to dremel the hole for the volt/amp meter and I need to cut the MLT dip tube to length.  The sight glasses were installed with a step bit.  So far I have only calibrated the boil kettle.  The element is covered with 2.5 gallons and the whirlpool fitting is submerged with 5 gallons.  I placed my newly built kettles on a 72″x24″ stainless steel prep-table.  Since the temporary brewing space is still carpeted at this point I added a catalina cactus carpet below to catch drippings.

IMG_20140504_170805IMG_20140505_091306 IMG_20140504_170835 IMG_20140504_170850IMG_20140504_170856IMG_20140504_170829

Innovative Restaurant Supply (local)

1x 72″x24″ Stainless steel prep-table
1x 5’x3′ Catalina carpet

Punches and sight glasses

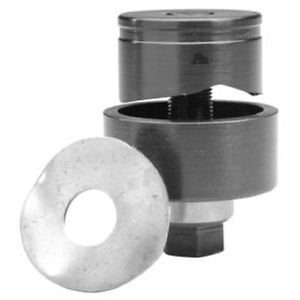
I was able to acquire a used greenlee 1-1/4″ chassis punch for a good price on ebay.  This is the largest and most expensive punch used for the the heating elements.  The 13/16″ chassis and 1/2″ conduit punch were purchased new from all-spec.com.  I also back decided to go back to sight glasses so I don’t have to remove the lids to check volumes.  You could use a step bit to make these holes but due to the quantity I need to create I think it is worth the investment.  I will likely sell them after I am done using them.

punch2

sight_glass


ebay.com
1x 1-1/4″ 730BB Chassis/Radio Punch (Heating elements)

all-spec.com
1x 13/16″ 730BB Chassis/Radio Punch (1/2″ Plumbing)
1x 1/2″ Conduit Slugbuster (Pannel buttons & switches)

brewhardware.com
3x 20″ Weldless sight glass kit for pots
3x Additional numbers 16-25 gallon + 1/2 gallon marks
1x Tube cutter
1x Sight glass cleaning brush

Whoops… false bottom surgery

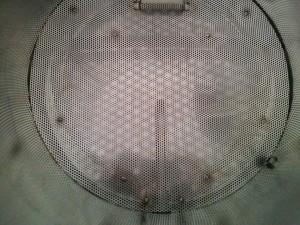
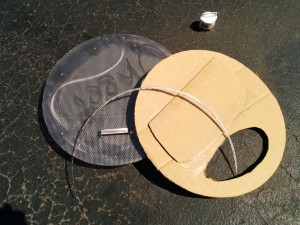
I made a poor assumption that the 18″x19″ concord kettles that look identical to the spike 18″x19″ kettles would be the same dimensions.   I should have measured… thankfully it was too large and a few minutes with a dremel fixed it right up.  I made a cardboard template and used that to mark the excess I needed to remove.  A few (5) cut off disks later  and I am back in business.  I really like this false bottom.  Jaybird makes a great product and he can cut them to a custom sizes if you provide that information.  The welded on stand in the new design is very nice and acts as a secondary filter.

false_fix

Last of the bulkheads and a dip tube for the MLT

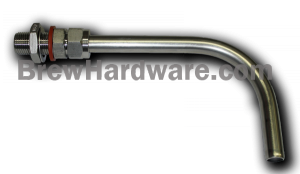
After looking at using the high flow 90 degree bulkheads for dip tubes I have decided to use them for everything but the dip tube in the MLT.  In order to assure clearance with my false bottom I am using a 5/8″ compression fitting bulkhead with 5/8″ dip tube.  The dip tube will be easier to cut to size then the high flow 90 and the 5/8″ size will make sure I don’t have any restrictions in the critical area before the wort pump.

mlt_dip


brewhardware.com
2x 1/2″ High flow 90 degree bulkheads
1x 5/8″ Compression bulkhead with dip tube

Lager Schedule

My Munich Helles is happily fermenting.  The smell lager yeast puts off is quite interesting…  Nothing like an ale.  The following is the schedule I will be using.  It ended up lining up perfectly with my next homebrew club (unyha) meeting.

4/12pm – 50 degrees, beer placed in fermentation chamber.
4/17pm – 53 degrees
4/18am – 56 degrees
4/18pm – 59 degrees
4/19am – 62 degrees
4/19pm – 65 degrees
4/23am – 60 degrees
4/23pm – 55 degrees
4/24am – 50 degrees
4/24pm – 45 degrees
4/25am – 40 degrees
4/25pm – 35 degrees
4/26am – 30 degrees
4/30 – Rack to keg @ 10.5psi
5/7 – Ready to serve

HERMS Coil and other SS components

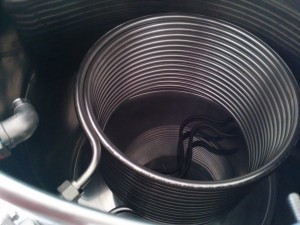
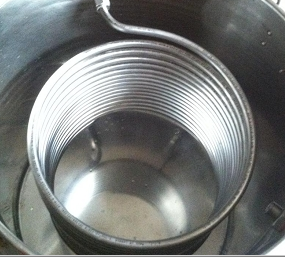
I ordered at 50’x12.5″ coil of 1/2″ stainless steel for my HERMS coil. I also ordered the camlocks and some other random stainless fittings.

herms_coilfemale_cam

Stainlessbrewing.com
1x 50’x1/2″ OD 12.5″ diameter SS coil with two 90 degree bends
10x 1/2″ High Flow Type C Camlock
1x Type A Camlock
11x Type F Camlock
2x 1/2″ SS Hex Nipple
3x 1/2″ SS Tee